Main Screen Overview
When you first open Debt Manager Professional, you'll see a screen that looks like this — your command center for creating, viewing, and managing client debt-reduction plans.
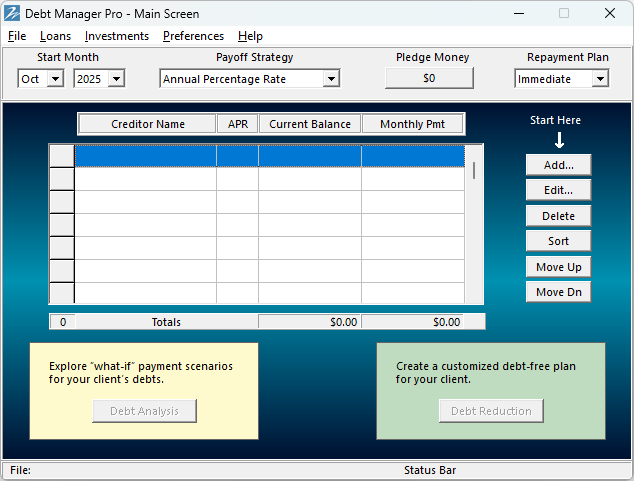
Everything you need is right in front of you, organized into easy-to-understand sections. Let's take a quick screen tour so you know what each part does.
1. Menu Bar

The Menu Bar runs across the very top. It gives you access to everything Debt Manager Professional can do.
- File – Create a new plan, open an existing one, save your work, or print reports.
- Loans – Add, edit, or delete creditor information.
- Loans – Calculate payments, price ranges, or remaining balances for any loan.
- Investments – Estimate future value, required deposits, or growth of savings and investments.
- Help – Open this help system anytime you need guidance.
2. Plan Panel

Just below the menu bar is the Plan Panel — where you set the key details that shape your client's payoff plan:
- Start Month and Year determine when payments begin.
- Payoff Strategy lets you choose how to prioritize debts (by interest rate, balance, etc.).
- Pledge Money shows any extra monthly amount your client wants to add toward debt reduction.
- Repayment Plan defines how quickly the plan begins — for example, Immediate starts right away.
3. Creditor Table
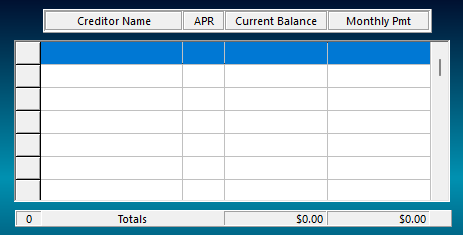
The Creditor Table displays each creditor's information, including Creditor Name, APR, Current Balance, and Monthly Payment. The bottom row shows totals, giving you an instant snapshot of your client's overall debt situation.
4. Action Buttons

The Action Buttons on the right let you manage your creditor list quickly:
- Add... a new creditor
- Edit... details for an existing one
- Delete to remove a creditor
- Sort, Move Up, or Move Dn to control how creditors appear in the list
The arrow labeled Start Here is a friendly reminder that adding creditors is usually your first step.
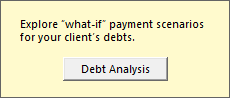
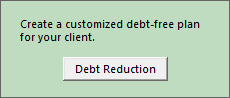
5. Analysis and Reduction Panels
These panels guide you to the program's two most powerful features:
- Debt Analysis lets you examine a single debt in detail. You can test different payment amounts to see how they affect that specific account's payoff time and total interest paid.
- Debt Reduction combines all debts into a single, customized payoff plan designed to eliminate every debt as efficiently as possible.
6. Status Bar

The Status Bar runs along the bottom of the screen and keeps you informed while you work. It displays the current file name and important status messages.
- No file loaded: When you first start Debt Manager Professional, the Status Bar is empty, showing that no client file is open.
- File loaded: Once you open a client file, such as Sample2.dmpf, the file name appears on the left side of the bar.
- File modified: If you make changes that have not yet been saved, the word Modified appears beside the file name as a helpful reminder to save your work.
That's Your Control Center
That's all there is to it! Once you know your way around the main screen, you'll feel right at home. Everything you do in Debt Manager Professional — creating new client plans, running analyses, and printing reports — starts right here.